SolAxe™ GT-801 Build Guide
Engineering manual for building an off-grid solar Bitcoin micro-miner in a ventilated black PVC 5.9" × 4.3" × 2.8" junction box with internal MPPT and buck voltage regulation.
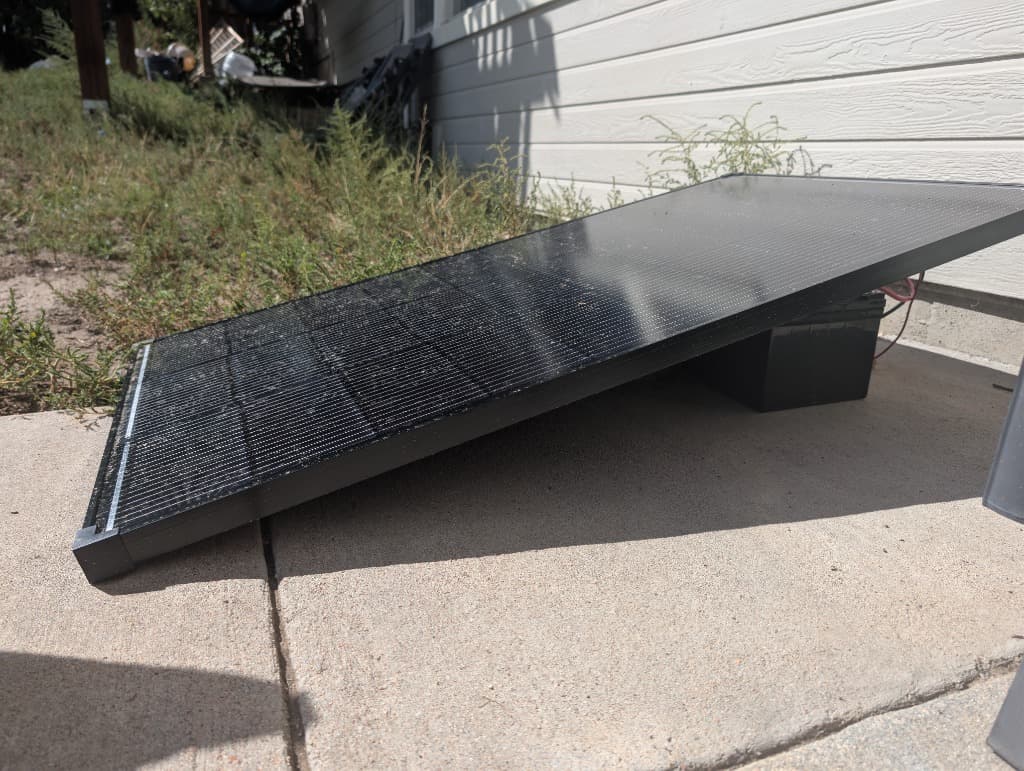
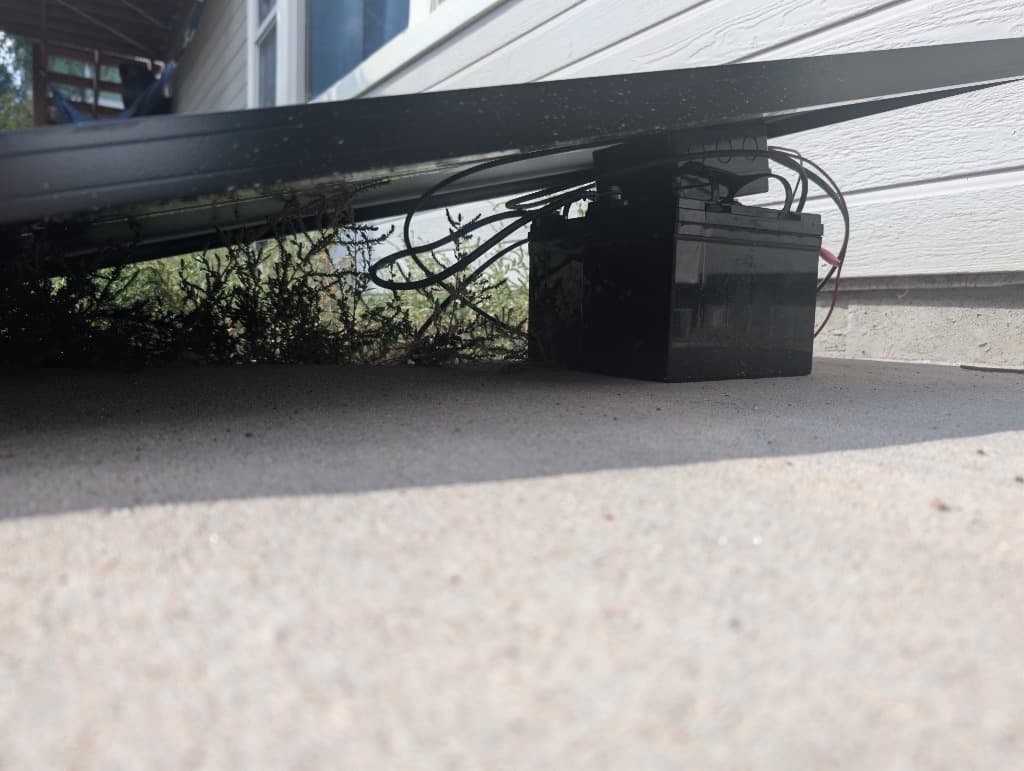
Full solar field deployment: 100W monocrystalline PV panel, 12V battery buffer, and SolAxe GT801.
1. System Architecture & Core Principles
Off-Grid Solar Operation • Internalized Power Electronics • Positive-Pressure Cooling
Internalized Power Electronics
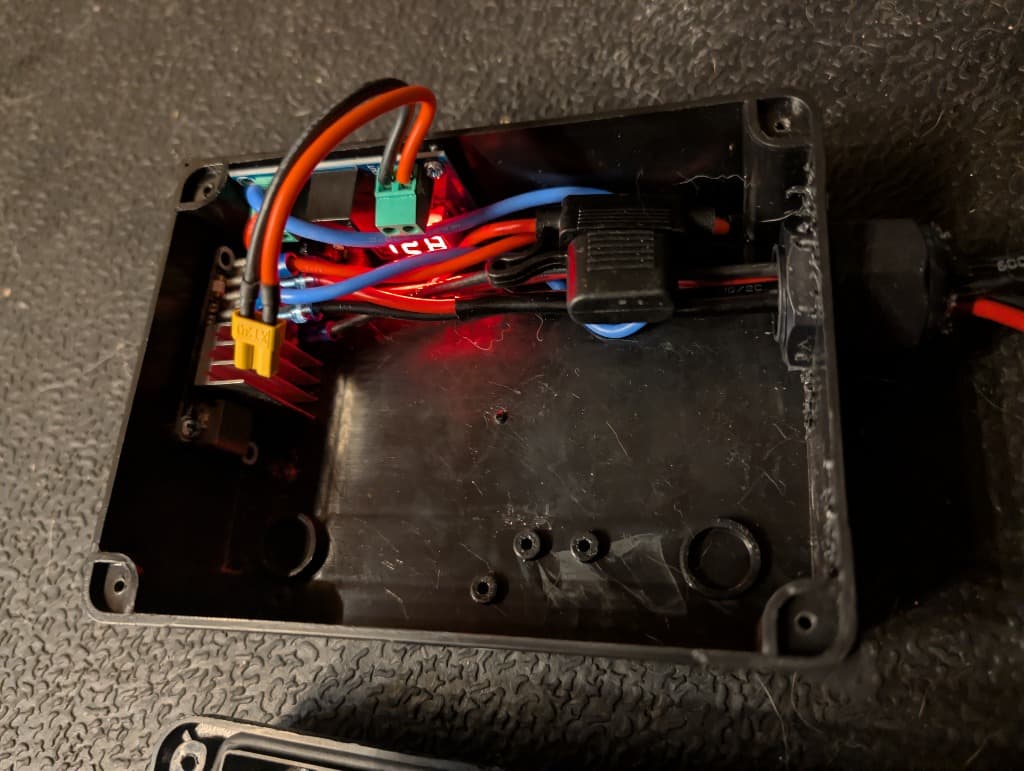
Unlike standard Bitaxe miners that require delicate 5V external AC/DC wall warts, the SolAxe GT801 integrates a solar MPPT tracking board and a synchronous step-down buck converter directly inside the enclosure. It accepts 9V–28V DC directly from solar panels or 12V battery buffers.
Live Digital Voltmeter
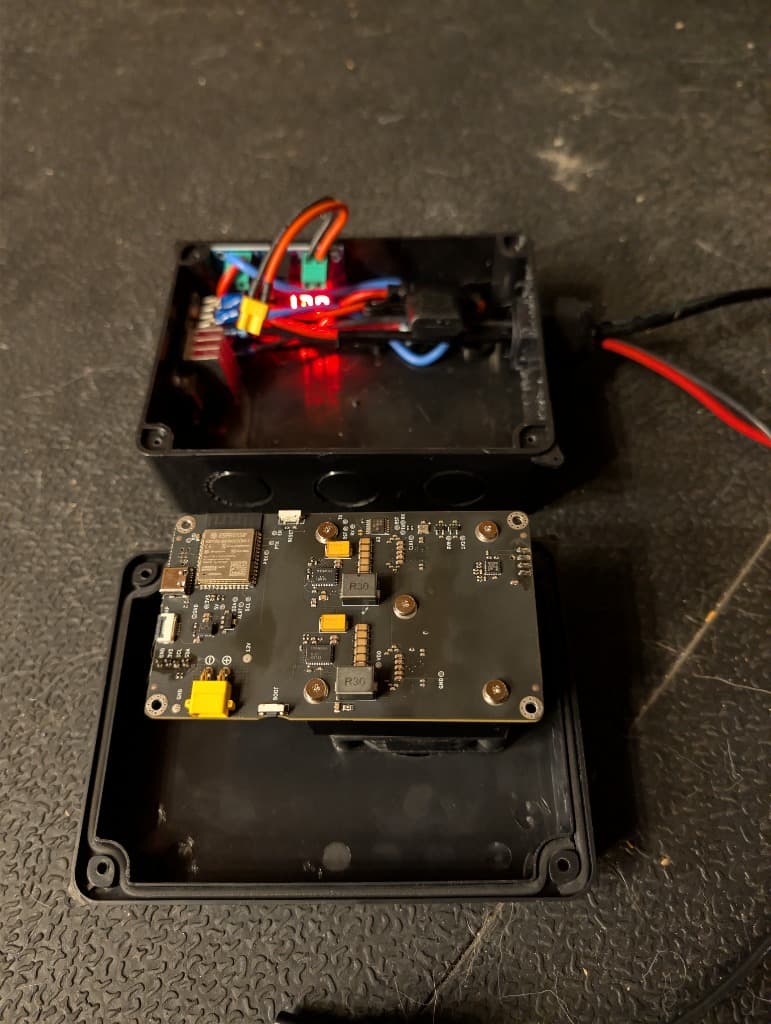
A bright red 3-digit LED voltmeter module is wired to the internal regulated 5V DC rail. This provides instantaneous visual verification in the field during potentiometer calibration without needing a handheld digital multimeter.
Positive-Pressure Crossflow
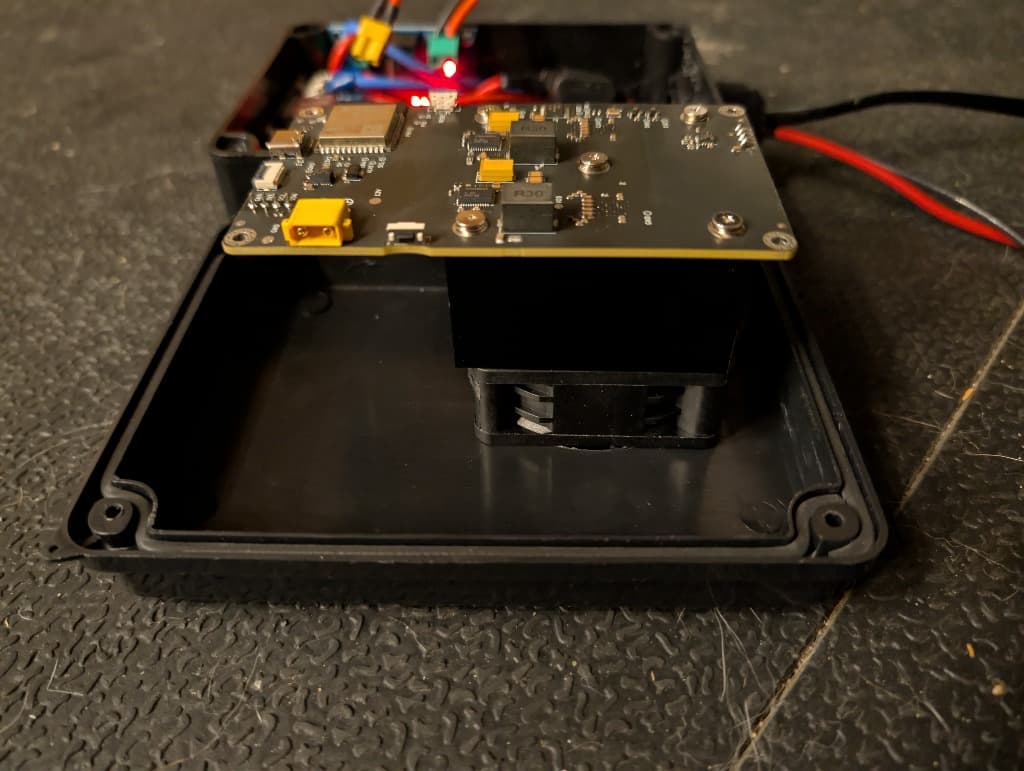
Housed in a 5.9" × 4.3" × 2.8" matte black PVC junction box. A top-mounted high-flow 50mm fan forces air across the aluminum heatsink, creating positive pressure that exhausts through 55 precision-drilled 3.5mm relief holes while shedding rain and dust.
2. Complete Bill of Materials (BOM)
All components are off-the-shelf, standard open-source hardware.
| Component | Specification / Model | Role | Est. Cost | Source |
|---|---|---|---|---|
| ASIC Hashboard | Bitaxe 801 (BM1370 ASIC) | SHA-256 Mining Engine (~1.2 TH/s @ 18W) | $180 – $220 | Open-Source / D-Central / SoloSatoshi |
| Enclosure | Matte Black PVC Junction Box (5.9" × 4.3" × 2.8" / 150×110×70mm) | Weather-resistant chassis with silicone gasket | $12 – $16 | Amazon / McMaster-Carr |
| Voltage Regulator | High-Efficiency Synchronous Buck Converter (9V–36V In → 5V 5A Out) | Steps solar/battery voltage down to clean 5V DC | $8 – $14 | Amazon / Pololu / AliExpress |
| Solar MPPT Board | CN3791 / MPPT 12V/18V Photovoltaic Controller Board | Tracks peak solar panel power point under cloudy/variable light | $6 – $10 | Amazon / AliExpress |
| Digital Voltmeter | 0.28" Red 3-Digit Mini DC Voltmeter (2.5V–30V) | Real-time visual monitoring of internal 5V rail | $3 – $5 | Amazon / SparkFun |
| Cooling Assembly | 5015/5020 High-Static PWM Fan + Extruded Heatsink + Stainless Wire Guard | Active chimney convection over BM1370 & VRM | $12 – $18 | Noctua / Delta / Sunon |
| Power Connectors | XT30 Heavy-Duty Connectors + Solder-Sleeve Heat Shrink Splices | Vibration-proof, quick-disconnect power harness | $5 – $8 | Amazon / Hobbyking |
| Cable Passthrough | PG-13.5 Liquid-Tight Brass / Nylon Cable Gland with Silicone Seal | Strain relief & water-tight solar cable entry | $3 – $6 | Amazon / Home Depot |
| Circuit Protection | In-Line Waterproof Mini Blade Fuse Holder + 5A Fast-Blow Fuse | Over-current and reverse-polarity protection | $3 – $5 | AutoZone / Amazon |
3. Step-by-Step Fabrication & Wiring
Machining the Enclosure • Harness Splicing • Potentiometer Calibration
Machining the 5.9" × 4.3" × 2.8" PVC Enclosure
1. Print the 1:1 scale drill template on letter paper (or use the DXF file on a laser cutter/mill). Center the 50mm circular hole on the upper lid for fan intake.
2. Drill four 3.2mm perimeter holes to accept M3 socket screws for the stainless spiral finger guard.
3. Drill a 20.5mm hole on the lower side face for the PG-13.5 brass cable gland.
4. On the bottom and side walls, drill a staggered matrix of 55 convective relief holes using a 3.5mm bit. This diameter is chosen specifically to maintain water surface tension rejection against wind-blown spray.
Custom Power Wiring Harness (XT30 & Solder Sleeves)
1. Strip 1/4" of insulation from 14AWG silicone high-strand wire leads.
2. Solder the input DC leads through the in-line 5A blade fuse holder to the solar MPPT board input terminals.
3. Connect the MPPT output to the buck converter DC input terminals.
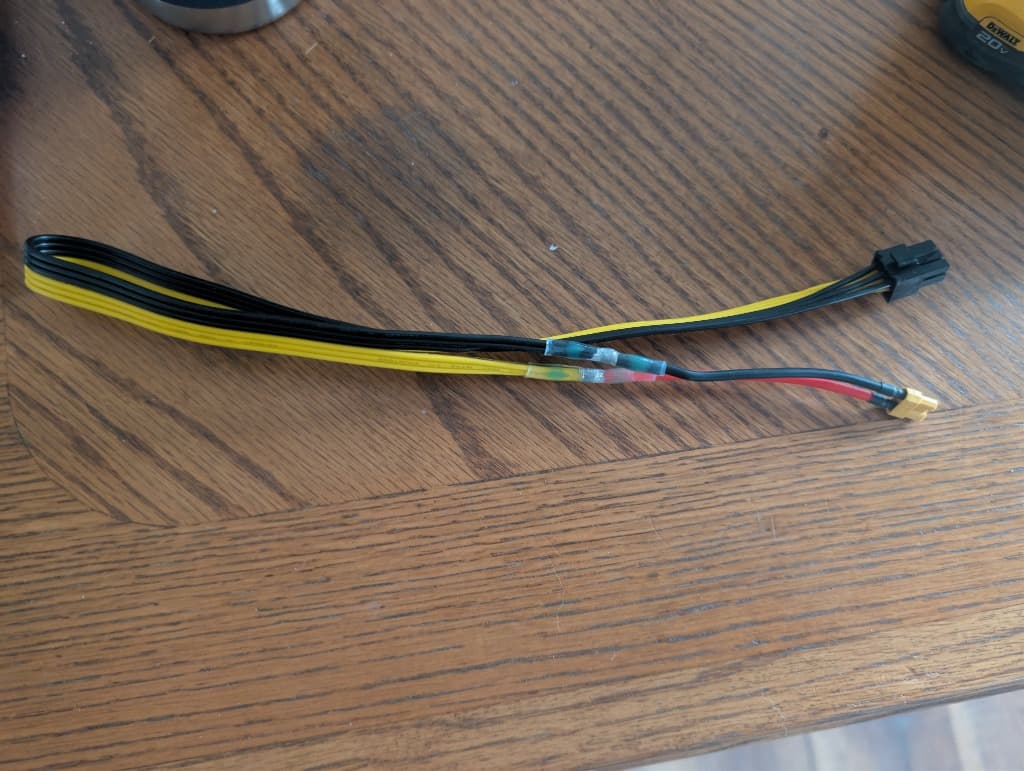
4. Solder an XT30 male connector to the buck converter 5V regulated output with the red digital voltmeter leads spliced in parallel using low-temperature solder-sleeve heat shrink connectors. Heat with a hot-air rework gun at 260°C until the solder ring reflows completely.
Potentiometer Voltage Calibration
1. CRITICAL: Do NOT plug the Bitaxe 801 board into the XT30 harness yet!
2. Apply 12V–18V DC power to the solar input leads. Observe the red digital LED voltmeter light up.
3. Using a precision flat-head screwdriver, turn the multi-turn trimpot on the step-down buck converter until the LED display reads exactly 5.20V DC.
4. The Bitaxe 801 hashboard pulls approximately 3.6A–4.0A under full BM1370 load, causing a ~0.18V–0.20V line drop across the harness and connectors. Setting 5.20V unloaded ensures the board receives a perfect 5.00V–5.02V DC under full load.
AviaryOS Solar Firmware Configuration
Standard AxeOS firmware trips thermal or brownout watchdog resets when panel voltage sags. Under AviaryOS Solar Edition, configure the following parameters in the web console:
4. Photovoltaic Array & Battery Sizing
Energy Harvest Equations for Continuous Off-Grid Mining
Recommended Off-Grid Setup (Field-Tested)
- ☀️Solar Panel: 100W 18V Monocrystalline Panel
- 🔋Battery Buffer: 12.8V 15Ah LiFePO4 or 12V 18Ah AGM
- ⚡Daily Consumption: ~450 Wh / 24 hrs (18.5W avg)
- ⏱️Buffer Runtime: ~8–10 hours of zero-sunlight runtime
Mounting & Weatherproofing Tips
Mount the SolAxe junction box directly underneath the shaded underside of your tilted solar panel frame. This keeps the box out of direct baking solar radiation, reducing internal ambient temperature by 10°C–15°C. Keep the ventilation orifices tilted slightly downward to prevent pooling from rain.
Ready to Build or Deploy?
Download the complete fabrication package containing 1:1 printable PDF drill templates, vector DXF laser files, full electrical schematics, and AviaryOS firmware binaries. Or claim one of the two hand-assembled Colorado prototypes ready for immediate field deployment.